 Sunreach
AR sun path: the sun over your camera view
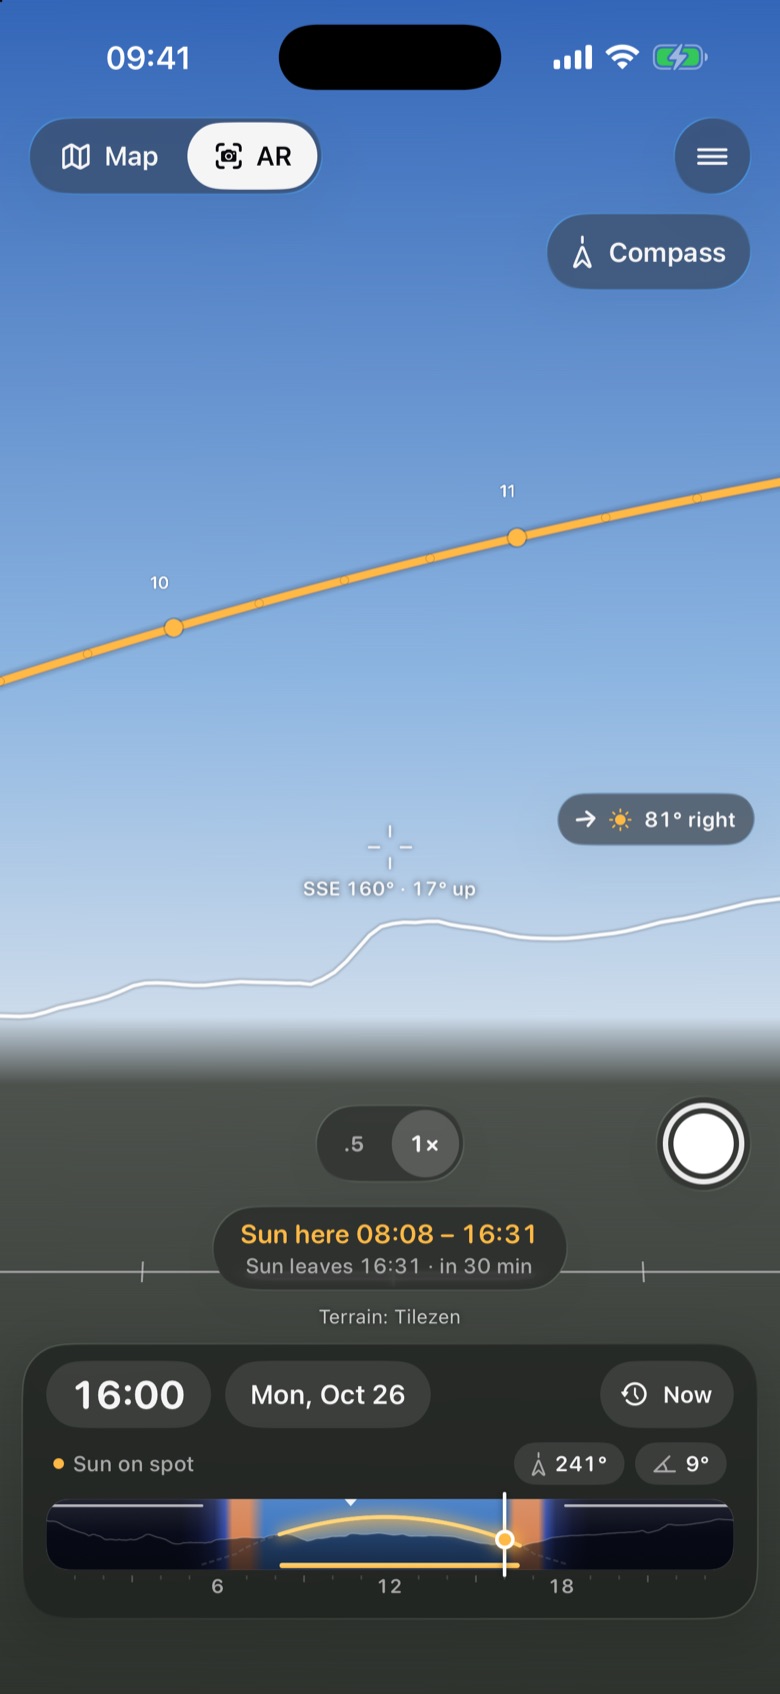
Where you stand, AR shows exactly where the sun will travel across the sky in front of you, and where it will meet the ridge. It is the quickest way to answer “will the sun come over that hill, and when?”
Free, with a small watermark on photos and videos; Pro removes the watermark.
Sunreach is coming soon to iPhone and iPad; screenshots are from the iOS Simulator, 26–27 October 2026.
What it does
Over the camera view: the day’s sun path with hour marks, the terrain skyline, named peaks, a compass on the true horizon and a reticle with direction and height. A pointer at the edge shows the way to the sun when it is out of view, and a caption says when the sun is on you, for example “Sun here 08:08–16:31”.
At night the moon’s path, the moon itself and the Milky Way are drawn too. The shutter takes a photo or, held down, records a video with the place, time and sun direction written in.
How it works
AR uses your current location only: it opens on a fresh position fix and always plans for where you are, even if you have another spot open. For a place you are not at, use 3D at eye level.
It starts on the phone’s compass. From the alignment menu you can turn on Auto-align on the sun, which lines the overlay up on the sun’s disc, or tap Align now to match the sun and the mountains once. A sideways drag lines it up by hand.
How to use it
- On the home screen, switch Map | AR to AR and allow the camera and location.
- Hold the phone up and move it slowly until tracking settles.
- If the lines look off, open the alignment menu (top right) and tap Align now, or drag sideways to line up by hand.
- Drag the clock to see where the sun will be later; switch 0.5× / 1× where your iPhone offers the ultra-wide.
- Tap the shutter for a photo, hold it to record a video. Captures go to Photos.
Tips
- Check AR before you set up: point at the notch where you expect the sun and scrub the clock.
- The skyline in AR is always bare ground, so a tree in front of you is real even if the line passes behind it.
Good to know
- AR needs a real device with ARKit, a camera and location. Compass headings can be off by several degrees; align on the sun or the skyline when it matters.
- Auto-alignment refuses roofs, streets and reflections, and needs the sun or a clear skyline in view.