 Sunreach
3D view: orbit, eye level and drone
The 3D view puts the sun’s path over the real landscape and lights it. Scrub the clock and the shadows move across the valley; switch to eye level to see the view from the spot itself, or lift a drone camera up to 120 m.
Today and tomorrow at 24 mm are free; any date, all lenses and the drone camera are part of Sunreach Pro.
Sunreach is coming soon to iPhone and iPad; screenshots are from the iOS Simulator, 26–27 October 2026.
What it does
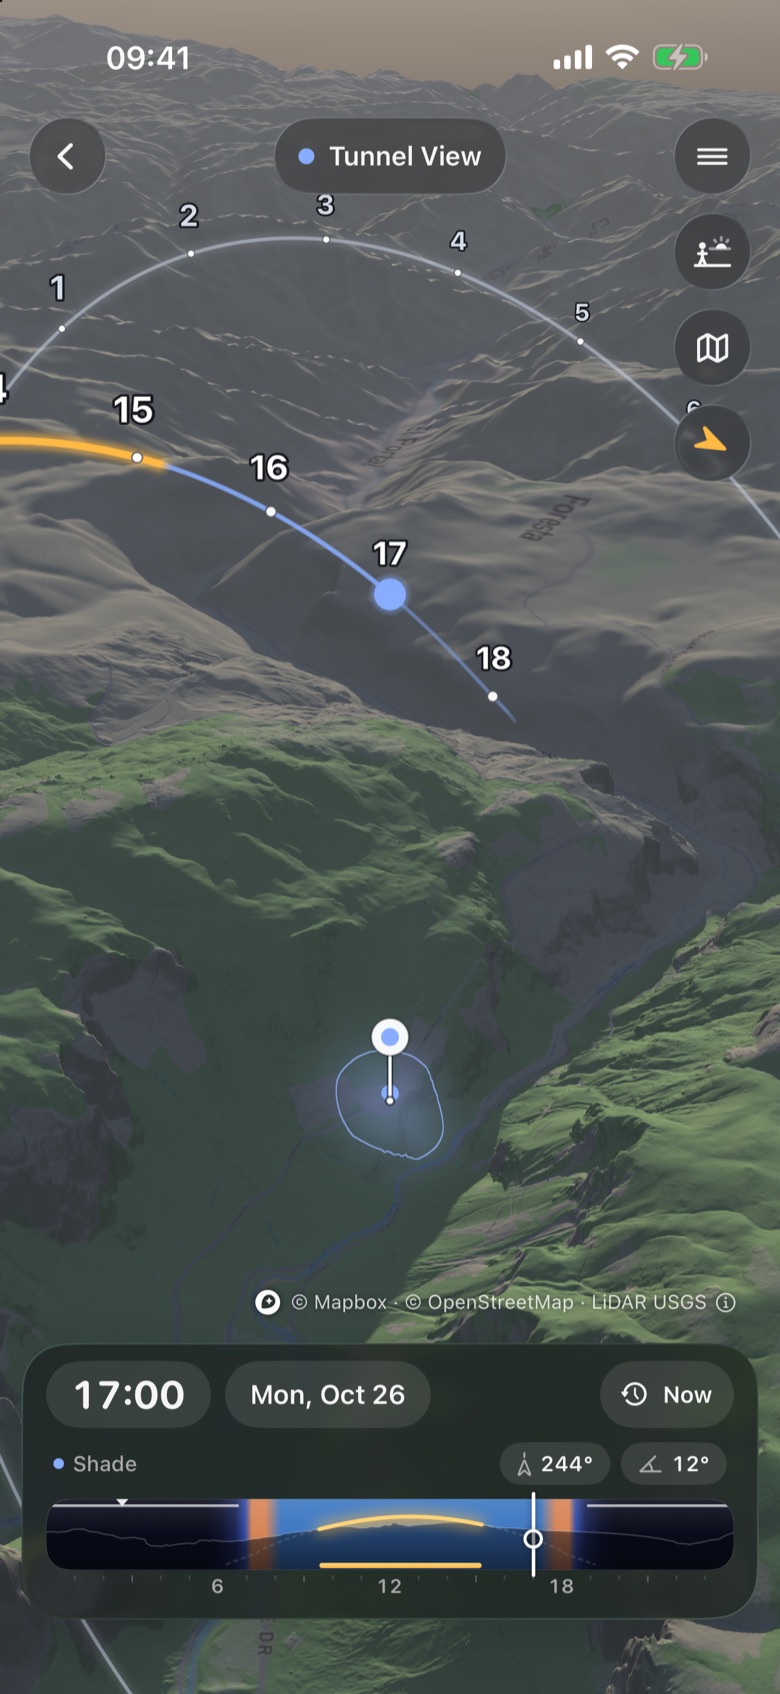
Orbit shows the terrain around the pin from above, with the sun’s path as a ribbon with hour marks. Close in over a town and the view hands over to 3D buildings; the Buildings chip switches them on and off.
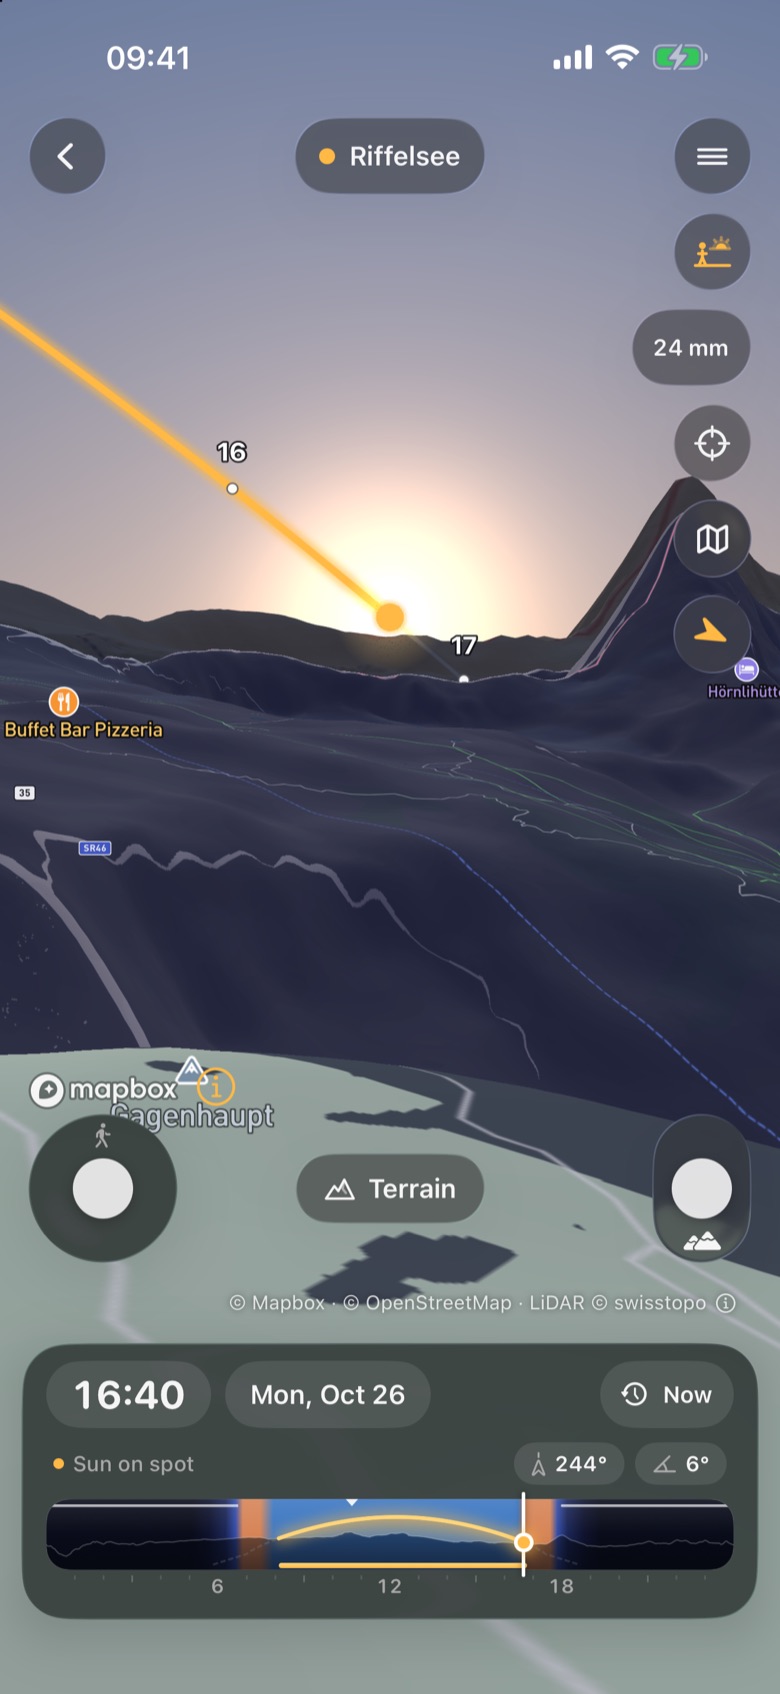
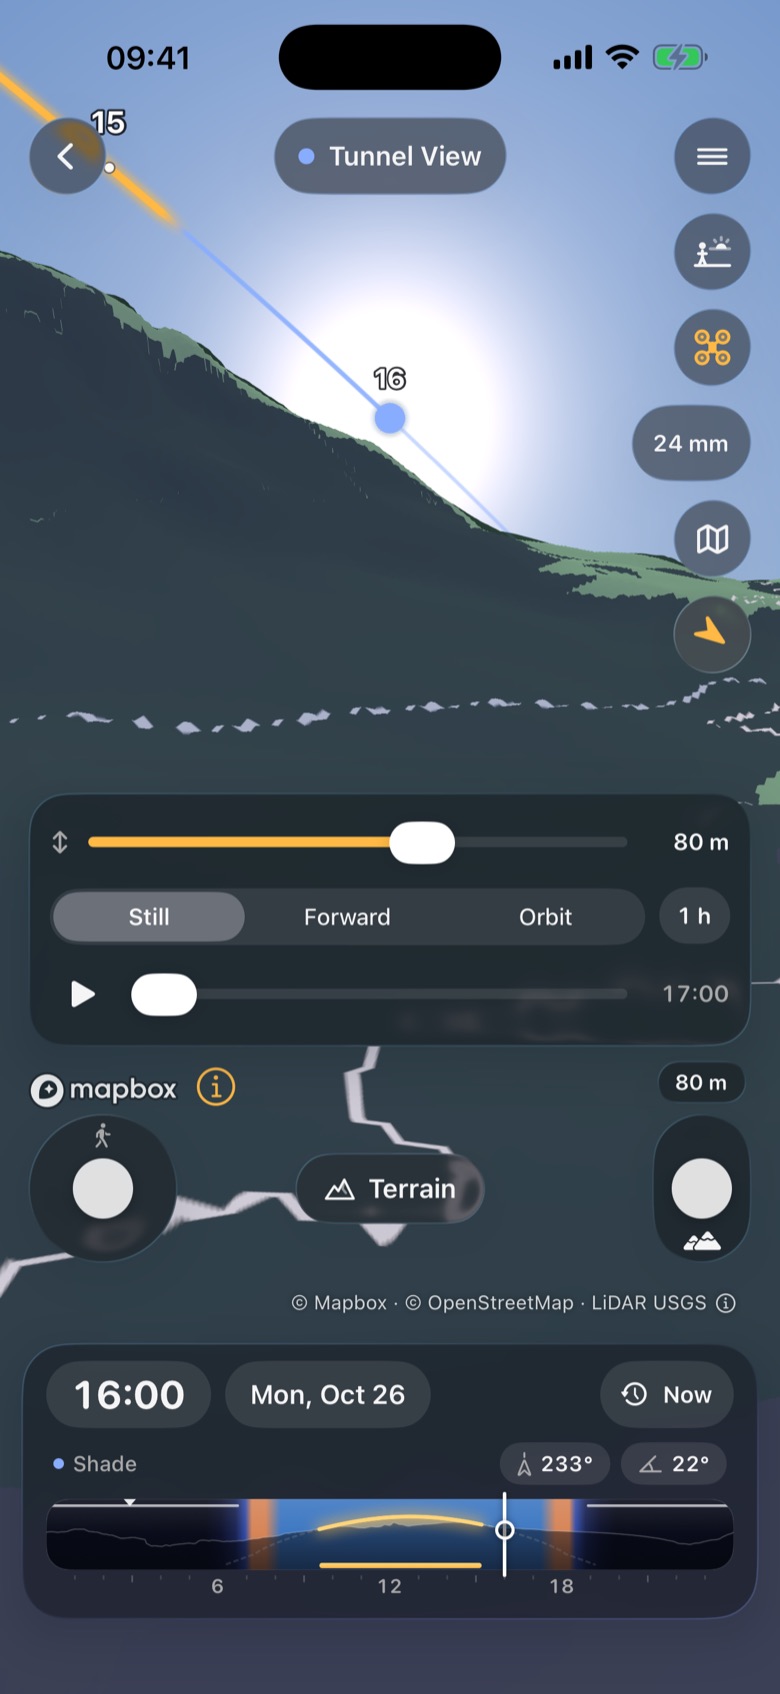
Eye level stands you on the spot, with lenses of 16, 24, 35, 50, 85, 135, 200 and 400 mm, a stick to walk and one to raise your eye. The Drone camera (switch it on in Settings > 3D) adds a height slider from 10 to 120 m and a still, forward or orbit hyperlapse plan.
How it works
The terrain is the same grid the plan uses, drawn at 40 m near the pin and 120 m beyond, with a 4 m patch close to the spot where there is lidar. Map or satellite imagery is draped over it and the GPU casts shadows from the sun for the time on the clock.
The eye-level view uses the same skyline as the plan, so when the sun touches a ridge in 3D, the plan says shade at that minute.
How to use it
- Open a spot and tap View in 3D.
- Drag to turn around the pin and pinch to zoom. Drag the clock strip to move the sun and the shadows.
- Tap the eye-level button to stand on the spot. Pick a lens, drag to look around, use the left stick to walk and the right one to raise your eye.
- With Drone on, set the height, pick Still, Forward or Orbit, a distance and a time span, and press play to preview the shot.
- Use the aim button at eye level to point at a notch or a tower and tap Find dates to search for an alignment.
In the app
Tips
- Use eye level to preview a viewpoint you have never been to. AR is for where you stand.
- At eye level, walking moves the spot once you stop, so the plan’s times follow you.
- The credit line at the bottom (for example “© Mapbox · © OpenStreetMap · LiDAR © swisstopo”) opens the full sources with ⓘ.
Good to know
- The drone camera is a visual preview: it is not an airspace, permission or flight-safety tool, and its sunlight at height is not a separately validated calculation.
- Trees are not in the terrain; buildings show only in the 3D city view.